

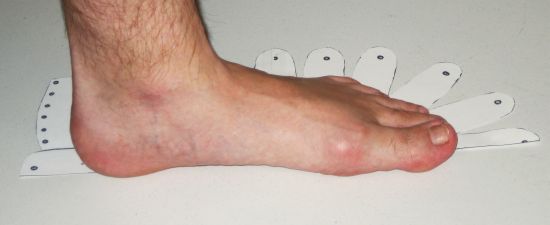
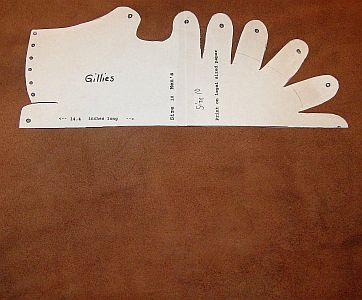
After the pattern is cut, select the leather you wish to make your shoes with. Normally 6-8 ounce leather is used, and you’ll need about 3-4 square feet. The leather color may bleed on your socks the first few times worn, depending on the dyes. Place the leather on a table, suede side up. Lay the paper pattern on the leather in such a way that there is room to flip/flop the pattern over along the long straight side. (The paper pattern is only half of your shoe). Trace around the bumpy half, then flip it over on the flat edge and trace around the other side. Do not mark the little circles at this time.
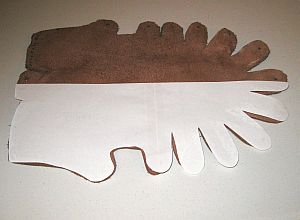
Using leather shears (or scissors you’re not worried about making very dull very fast!) cut the leather. If you drew a long straight line down the middle, DO NOT CUT IT! The two marks on the "Heel tab" DO need to be cut.
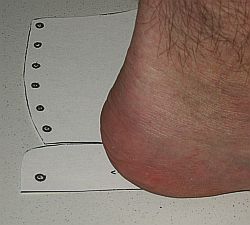
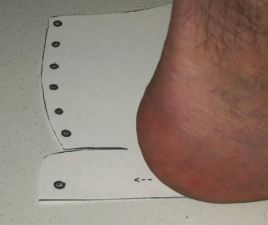
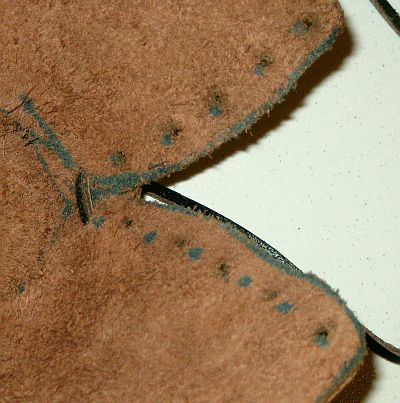
Mark the hole on the skin side of the leather. Try to center them in the end of the tab as best as you can. When you have all your holes punched, select your laces.


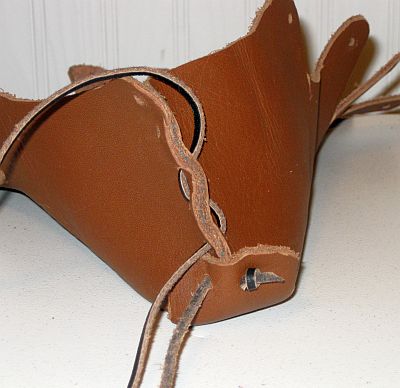
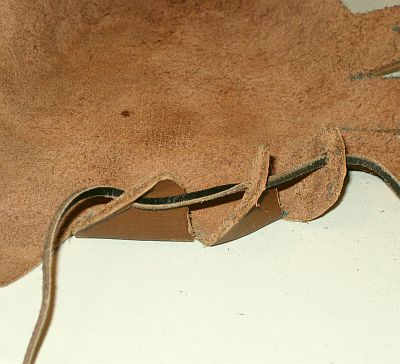
Start with the heel of the shoe. Bevel cut the lead end so it acts like a needle. Thread the lace into either hole on the heel tab from the outside of the shoe.
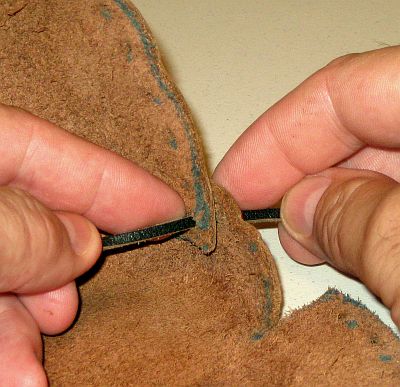
Then thread into the hole at the bottom of the row of six holes on the same side of your shoe from the skin side in.
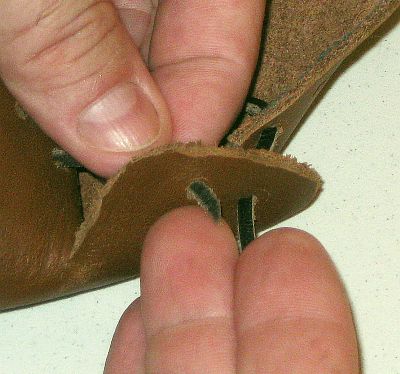
Crossing through the inside of the shoe to the other bottom hole, thread your lace from the suede side of the shoe and then through the other heel tab hole from the suede side out.
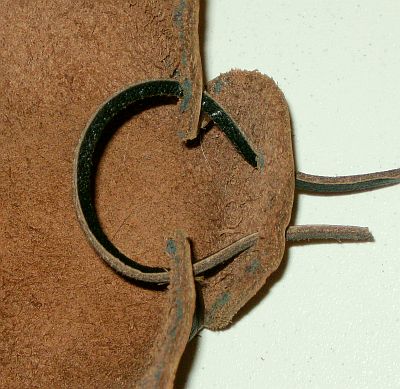
Pull the lace gently snug. Tie a single knot at the end of this lace, leaving about 1/2 inch.

The shoe will now want to try to fold the halves together, or at least it should. If not, re-thread.
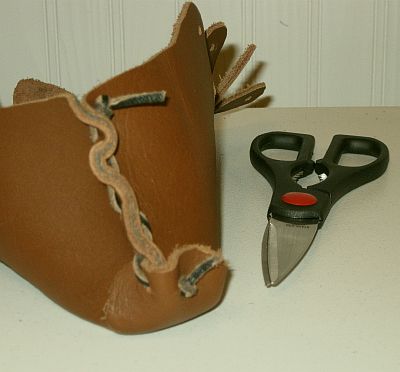
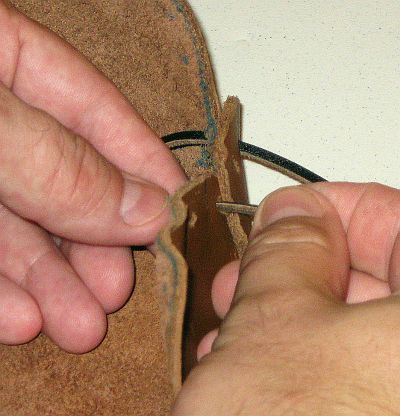
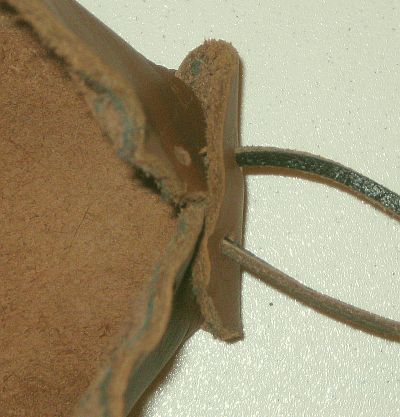
Continue to thread a running stitch up the back through all six holes. You could go round and round like a whip stich, but that doesn't seem to hold the heel together as well as the running stitch. When you reach the top hole, tie another knot and snug it against the top of your shoe. Cut the remaining lace free, leaving about a half inch of lace sticking out.
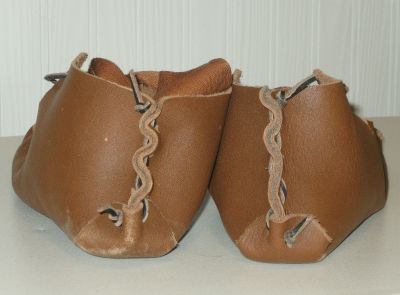
The other shoe will be laced as a mirror image. Doing this will have the knots on the outer side of your shoe. You will then have a left and a right shoe.
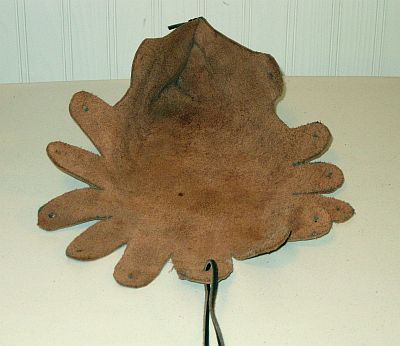
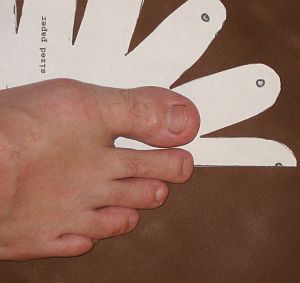
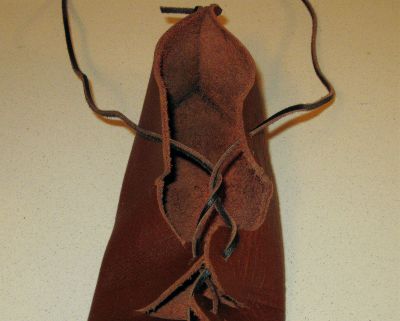
Now with both shoe backs laced, find the center toe tab. Thread your lace halfway through, making sure that your lace is equal length after threading the center toe tab. Using the SKIN side lace, stitch in the direction of the knots in your heel, two tabs from the outside to in. Your lace will go skin side to suede side, skin side to suede side.
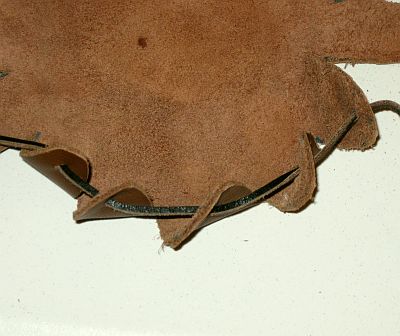
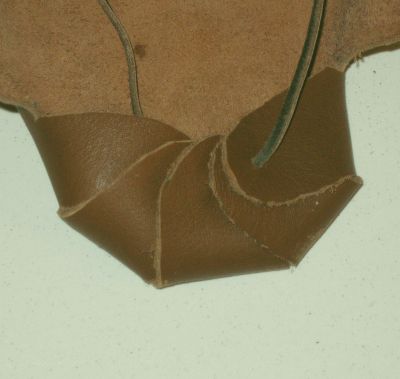
Now using the SUEDE side lace, stitch in the other direction two tabs. Carefully manipulate the five tabs just stitched on top of each other. They should all lay uniform on one another. You should now have the round of your toe complete.
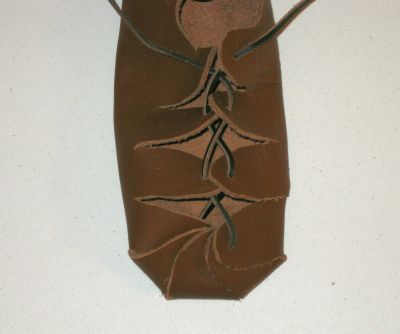
The rest of the stitching will be from the inside to out, crossing the laces as you work up the last holes at the ankle. Instead of just criss-crossing them, twist them over so the laces end up staying on the same side they came from. This keeps the laces from binding and irritating that tendon at the front of your ankle.
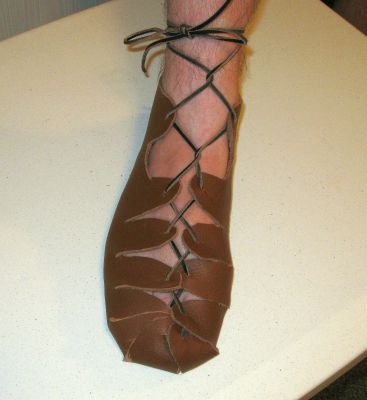
Slide your foot in. Adjust the laces so the tabs are fairly evenly spaced up your foot. Above the top eyehole, twist the laces once more and wrap both around yourankle in opposite directions, meeting at the outside flat of your shin. This allows your ankle and calf to flex without cutting off the circulation to your foot. Tie the bow here. You now have a shoe!.
Later when you have worn them you will see the pattern of your foot on the bottom. You may wish to add a sole to allow for use on rougher terrain. Some folks have tried "leather weld" but found that Gorilla glue (if applied properly) works much better. Dr.Scholls inserts can easily be added if you desire a little extra padding. I would describe myself as a tenderfoot, but find them quite comfortable on grass, sticks, gravel, asphalt, and conctrete without any additional padding. If you prefer something more period, felt sole inserts, felted socks or hosen work great.
If you choose to make a hard sole, you can do so by holding your marker straight up and down while you draw a circle around your bare foot, on to paper. From each side of your foot drawing subtract 3/8ths of an inch and round out the toes. This should make a good sole template for your shoe.
These shoes have also been used completely over corrective shoes, just expand the pattern to allow coverage for the existing shoe. Many people use this pattern as a base and modify it to meet their own needs.
Please keep your pattern to make more later. This is a copyrighted pattern, but feel free copy it and/or give it away. We would like everyone to have good looking and affordable period shoes.
Once you are comfortable with making these shoes, here are links to some other period shoes that may require an intermediate skill set for making
You can open them and print them, or 'right-click' and save them to your computer to print later. Women's sizes tend to run about 1-1/2 to 2 sizes smaller than men's, so a woman's 7 is the same as a man's 5. The smaller ones (up to size 8) will easily print to a single sheet of legal size paper. Sizes 9 and above are so big lengthwise they may need to be printed on 2 sheets of paper, cut, and taped together.