| |
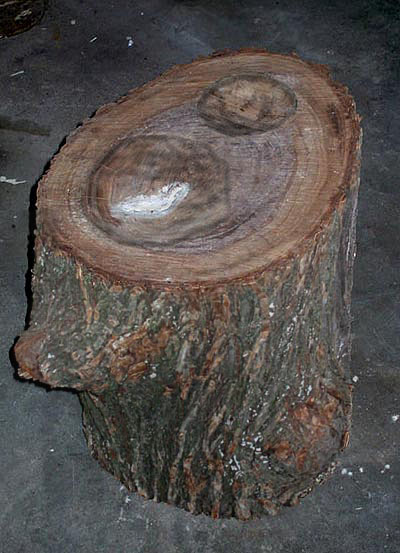 |
This is my "Armoring Stump", a hardwood stump I carved some dishing depressions into with a chainsaw and a sander. The nearer depression is about 7 inches across, while the one further away is about 4 inches wide. They are each about 1 1/4 inches deep. Out of pocket costs: 30 cents for sandpaper. It took about 4 hours to carve and sand the depressions the way I wanted them. Note the white stuff in the middle...that's some caulk I had to add after discovering a "soft spot" in the wood while pounding steel on the stump. Grrrr...
The stump itself was free, from a neighbors house up the street that had just cut down a tree that HAD to go. It weighs about 60 pounds, so it doesnt wiggle when I smack it with a hammer. To purchase a steel dishing plate would only be about $40 or $50, but this was a fun project to do, and it's a whole lot easier to justify to the wife! Not to mention that this is a much more period way of making elbows or knees as opposed to cutting the bottom off of an old oxegen tank. While I do want to build quality armor (I'm the one wearing it!), I don't have a budget that allows me to get too extravagant with equipment or materials. Saving money where I can lets me spend that cash on other things, like weapons and Whiskey! There's more than one way to practice Hurling, Laddie!
|
|
| |
| |
| |
| |
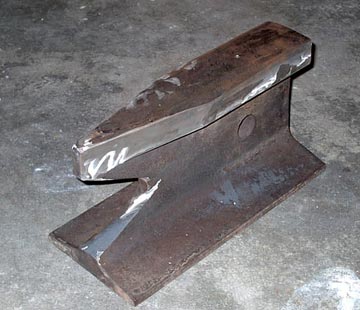
This is my newly constructed anvil, made from a section of railroad rail. It weighs right at 30 pounds, is about 12 inches long, 6 inches tall, and 5 inches wide at the base. Perfect for table top work! I acquired the unblemished rail section from His Grace Dongalus, an proceded to cut the corners and part of the center section off with an aluminum oxide metal cut off blade mounted in a regular circular saw (make LOTS of pretty sparks!). Once I had the basic shape, I smoothed it out and polished it with an angle grinder (MORE pretty sparks!). Last, I used a drill to cut in a "rivet divet". I don't know that that is exactly the correct name for it, but that is what I use the little 3/8 inch deep hole for... to steady rivets while I pein the other side. See next picture below
|
 |
|
| |
| |
| |
| |
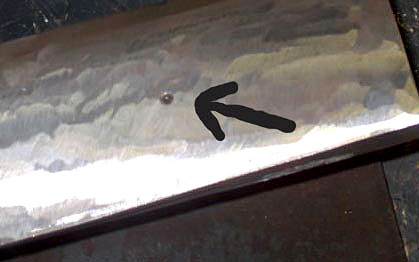 |
Anvil top showing "Rivet Divet". I HATE chasing rivets around the anvil, and this little depression saves me at least a few seconds per rivet. I used to occasionally hit rivets way off when I would chase them, sometimes causing them to bend at strange angles. No more of that, now!
|
|
| |
| |
| |
| |
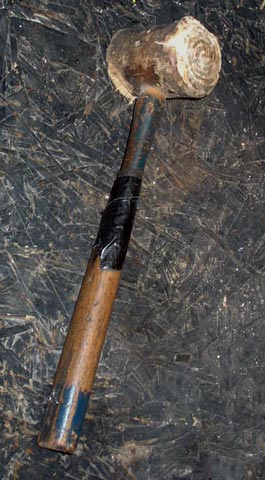
UNweighted Rawhide hammer. About 12 inches long, 2 inches diameter at the head, weighs about 4-6 ounces. This is used for bending the the metal without marking it. It is rather light in weight, so not very effective for bending metal of any thickness, say any steel thicker than 1/18th of an inch, or 18 gauge. It will bend it, you just have to hit it really hard to get it to bend. I haven't actually tried to bend anything thing thicker than 14 gauge steel with it, I think trying would hurt the hammer and just wear me out! Also very useful for pounding on leatherwork, either to punch holes for straps, or mashing down butt-stiching that is a just a little too tight.
|
 |
|
| |
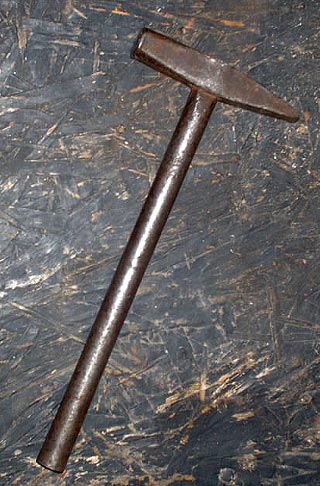 |
All steel Peening hammer. This is used to "peen" or dome over the straight part of the rivet when joining pieces of metal. The nice heavy head carries a lot of energy to the rivet without having to swing it very hard. The other end with the nice straight line is handy for working on the underside of ridges.
|
|
|
|
|
|
| Please be sure to see the Pictures section for some samples of my work. |